





How to Compress a Gas Strut for Installation
Quick Answer: To compress a gas strut for installation, use a bench vise, C-clamp, or specialized strut compressor tool to apply steady, controlled force to the piston rod. Never use brute hand force, heat, or puncture the cylinder, as the high-pressure nitrogen inside (up to 150 bar) can cause severe injury. If a strut is too difficult to compress, it usually indicates an incorrect force (N) selection or the need for a Traction Gas Spring.
Most gas strut installation jobs do not require you to compress a gas strut by hand. The lid, door, or hatch does that work as it closes. Gas struts hold pressurized nitrogen inside. They resist your push because that gas wants to stay expanded. Force ratings vary widely. For furniture lids weighing 6-10 kg, the recommended force per strut is 200-350 N. Medium-duty gas springs with 200-400 N suit kitchen cabinet lift supports.
Kitchen cabinet flap-up doors typically use lighter struts in the range of 60-120 N.
This guide helps you decide when compression is necessary and how to install safely. Always wear eye protection and gloves. Never puncture or heat the strut.
Key Takeaways
You rarely need to compress a gas strut by hand. The lid or door does it for you.
Always measure the extended and compressed lengths to ensure the strut fits.
Installation is easy with ball stud and socket fittings. Just snap them together.
Use a strut compressor or clamp for safe compression when necessary.
Never puncture or heat a gas strut. The pressure inside is dangerous.
Do You Need to Compress a Gas Strut by Hand?

Many people new to gas spring installation believe they must push the shaft in before fitting. This step is almost always unnecessary. The lid, door, or hatch compresses the strut as it closes. Forcing the shaft by hand works against nitrogen pressure inside the tube. Nitrogen is safe, non-flammable, and harmless to health. JUTENG offers gas struts with a force range from 40N to 1200N. Specific values include:
40N, 50N, 80N, 150N, 200N, 300N, 350N, 400N, 500N, 600N, 650N, 700N, 800N, 1200N
The correct force rating depends on the weight of the panel and the mounting geometry. For example, a 60-120 N strut suits a lightweight cabinet door while struts with higher ratings support heavy machinery covers. Choosing the right force and size eliminates the need to manually compress a gas strut during installation.
Check Size and Mounting Points
Before you install a gas strut, verify its extended length, compressed length, and stroke. The strut must fit the space at both full open and full closed positions. Automotive hoods provide a useful reference. Standard mounting distances for hood struts show typical center-to-center pivot measurements.
Measurement Type | Value Range / Specification |
|---|---|
Extended length (center-to-center pivot) | ~13.5" to 23.75" (max just under 24") |
Compressed length (center-to-center pivot) | ~13.25" to 13.375" (max just under 13.5") |
Stroke length | 9.90" (not critical if extended/compressed lengths fit) |
Force | 65 lb / 289 N |
Recommended measurement method | Unhook both struts, tilt hood forward until it nearly touches the pan, then measure center-to-center between the two pivot points to determine the longest extended length |
These values show that the hood opens about 10 inches. The compressed length stays under 13.5 inches to fit the closed gap. If an existing strut has a different extended length, the panel may not open fully. If the compressed length exceeds the available gap, the strut cannot close. This situation sometimes leads a person to think they must compress a gas strut by hand to make it fit. In reality, the correct size eliminates that need.
The mistake that causes most wrong-size orders: measuring overall length including the ball studs or brackets, then comparing it to a catalogue figure that's center-to-center. Two struts can look the same length on a tape measure and be 15–20 mm (0.6–0.8 in) apart once you account for fitting style. Always measure to the center of the pivot point, not the outer tip of the fitting.
Measuring correctly prevents ordering an incorrect strut. If the strut does not fit after measuring, replace it with one that does. Never try to force it.
When Natural Compression Works
Compressing a gas strut for installation becomes unnecessary when the mounting points align properly. The strut compresses on its own as the panel closes. Follow these steps to measure and confirm.
First, measure the extended length. Remove one end of the strut and let it fully extend. Measure from the center of one mounting point to the center of the other. The door must be fully open for the measurement to be accurate. For hood struts, tilt the hood forward carefully.
Second, measure the compressed length. With the door or lid fully closed, measure the same center-to-center distance. This value confirms the strut physically fits when the panel is closed. If the strut is still in place, remove it and carefully compress it to get the measurement.
Third, calculate the stroke. Subtract the compressed length from the extended length. For example, a hatch strut measures 500 mm extended and 350 mm compressed. The stroke equals 150 mm. This value indicates how far the panel travels.
If the extended length matches the mounting distance at full open and the compressed length matches at full closed, the strut works naturally. There is no reason to compress the gas strut by hand. The panel does all the work during installation. Simply attach both ends at the pivot points and close the panel. The weight of the panel compressing the gas strut is a smooth, controlled motion.
Manually compressing a gas strut might seem like a shortcut, but it often leads to trouble. The risk of slipping, losing grip, or damaging the seal increases without proper tools. Even a 200N strut resists with about 45 pounds of force. That force is enough to cause injury if the hand slips. The correct approach is to verify size, attach both ends, and let the panel compress the strut. This method is safe, simple, and effective.
How to Compress a Gas Strut for Fitting Without Tools
Secure the Lid or Component
Tool-free installation starts with a stable panel. Open the lid, door, or hatch fully. Support it with a prop or ask a helper to hold it steady. This step prevents the panel from falling during the work. A moving panel makes it hard to properly install a gas strut.
Check the mounting brackets next. Each bracket should have a ball stud already screwed into place. Furniture applications commonly use ball stud and socket fittings for tool-free removal. Cabinets, hatches, and toolbox lids all rely on this simple connection style. The socket on each strut end snaps onto the ball stud with hand pressure alone.
Attach Ends and Test Movement
The attachment process requires no tools. Follow these steps to compress a gas strut for fitting through natural panel movement.
Position one gas strut socket so it is aligned with the ball stud on the mounting bracket.
Push the socket firmly onto the ball stud until it clicks and snaps into place.
Repeat the same snapping procedure for the socket on the opposite end and its corresponding ball stud.
Tug gently on both ends of the gas strut to verify that each socket is securely engaged.
Snap the gas strut's socket onto the ball. It should click firmly onto the ball with a positive engagement.
A 10 mm ball stud is a common size for this connection. The socket snaps over the ball and holds the strut in place. This method works because the connection is made by snapping the socket onto the ball stud, not by threading or bolting.
After both ends are attached, test the movement. Close the lid slowly. The strut compresses on its own as the lid closes. No manual force is needed. This is how to compress a gas strut for fitting without tools. The panel weight does the work.
After installation, cycle the strut 20–30 times to ensure consistent locking and release.
This cycling test confirms smooth operation. If the strut binds or the panel does not close fully, check the mounting alignment. JUTENG provides design support and stock solutions to help with proper sizing. Their team can guide you through installing a gas strut correctly.
Safe Ways to Compress a Gas Strut Before Installation
Safety comes first when you compress a gas strut before installation. Wear goggles and gloves every time. Never puncture, heat, or over-compress the cylinder. The nitrogen inside is safe and non-flammable. The pressure still demands respect. A sudden release can cause injury. Follow proper methods to compress a gas strut without risk.
Method 1: Using a Bench Vise or C-Clamp (For Medium Force)
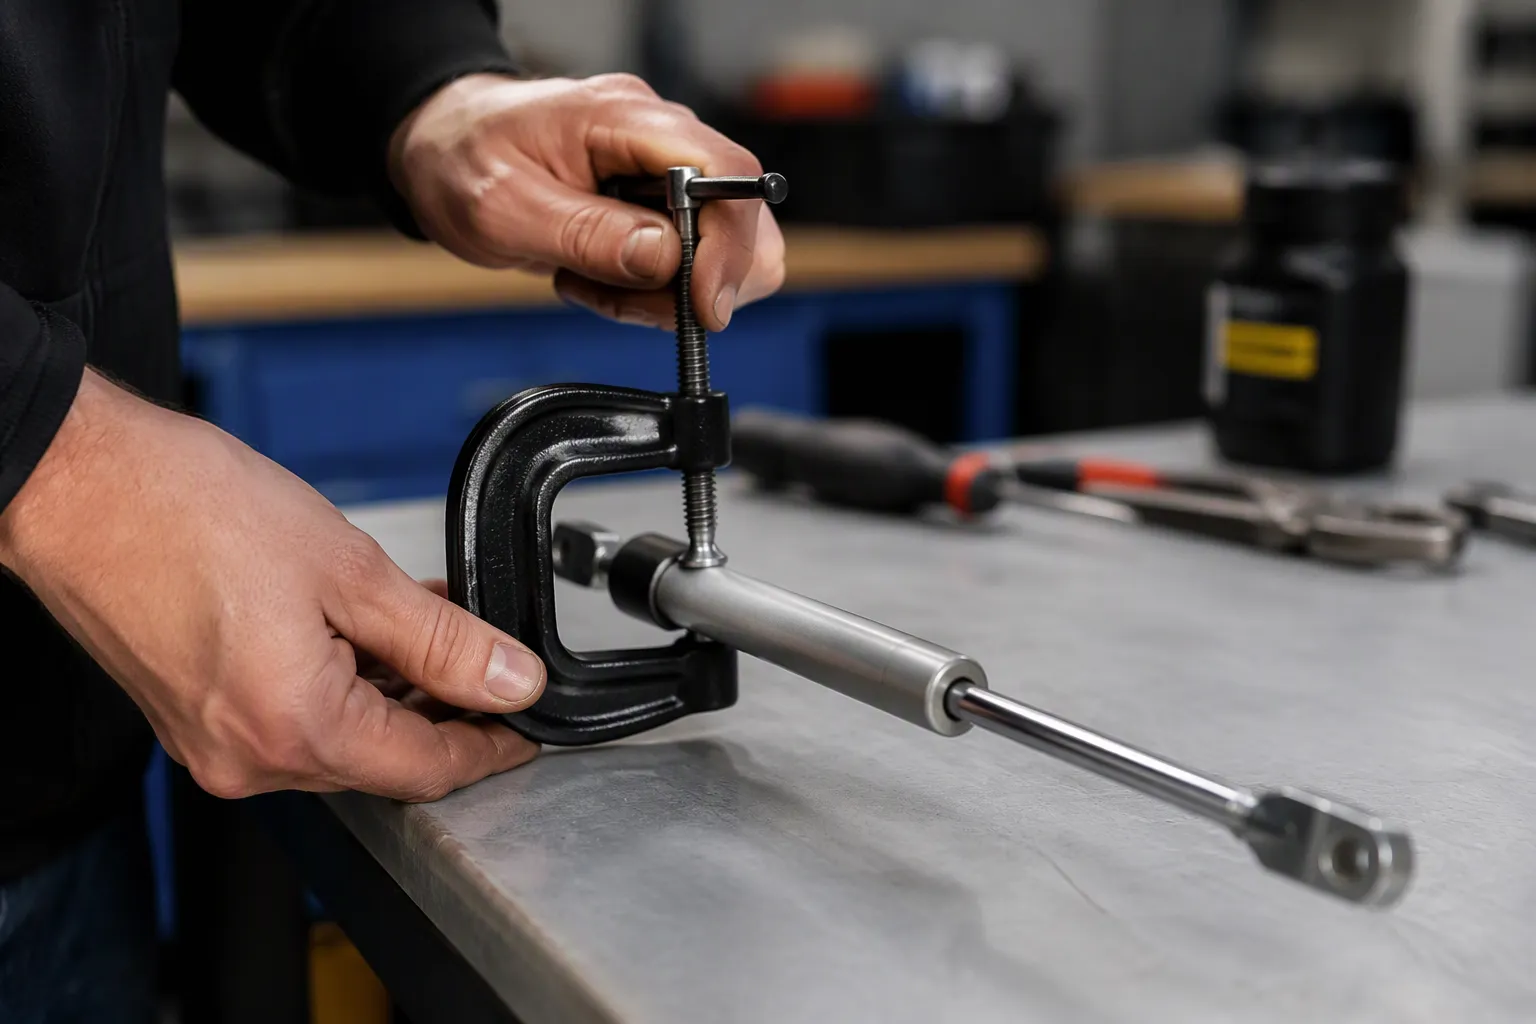
If the panel cannot compress the strut naturally, you must use mechanical advantage. Follow these steps to compress the strut safely without damaging the piston rod or seals:
Protect the Rod: Wrap the chrome piston rod and the pressure tube in a soft cloth or rubber pads. Metal-on-metal contact in a vise will scratch the rod, destroying the internal seals and causing gas leakage.
Position Securely: Place the gas strut in a bench vise or align a C-clamp over the mounting brackets. Ensure the strut is perfectly straight to avoid side-loading (bending the rod).
Apply Slow Pressure: Tighten the vise or clamp gradually. Do not jerk or use sudden force. The nitrogen gas needs time to compress.
Lock and Install: Once compressed to the required length, keep the clamp tight, align the ball studs, and snap the sockets into place.
⚠️ JUTENG Safety Warning: Never use a heat gun or blowtorch to shrink a gas strut. Heat destroys the rubber O-rings and can cause the pressurized nitrogen tube to explode violently.
Method 2: Apply Controlled Leverage
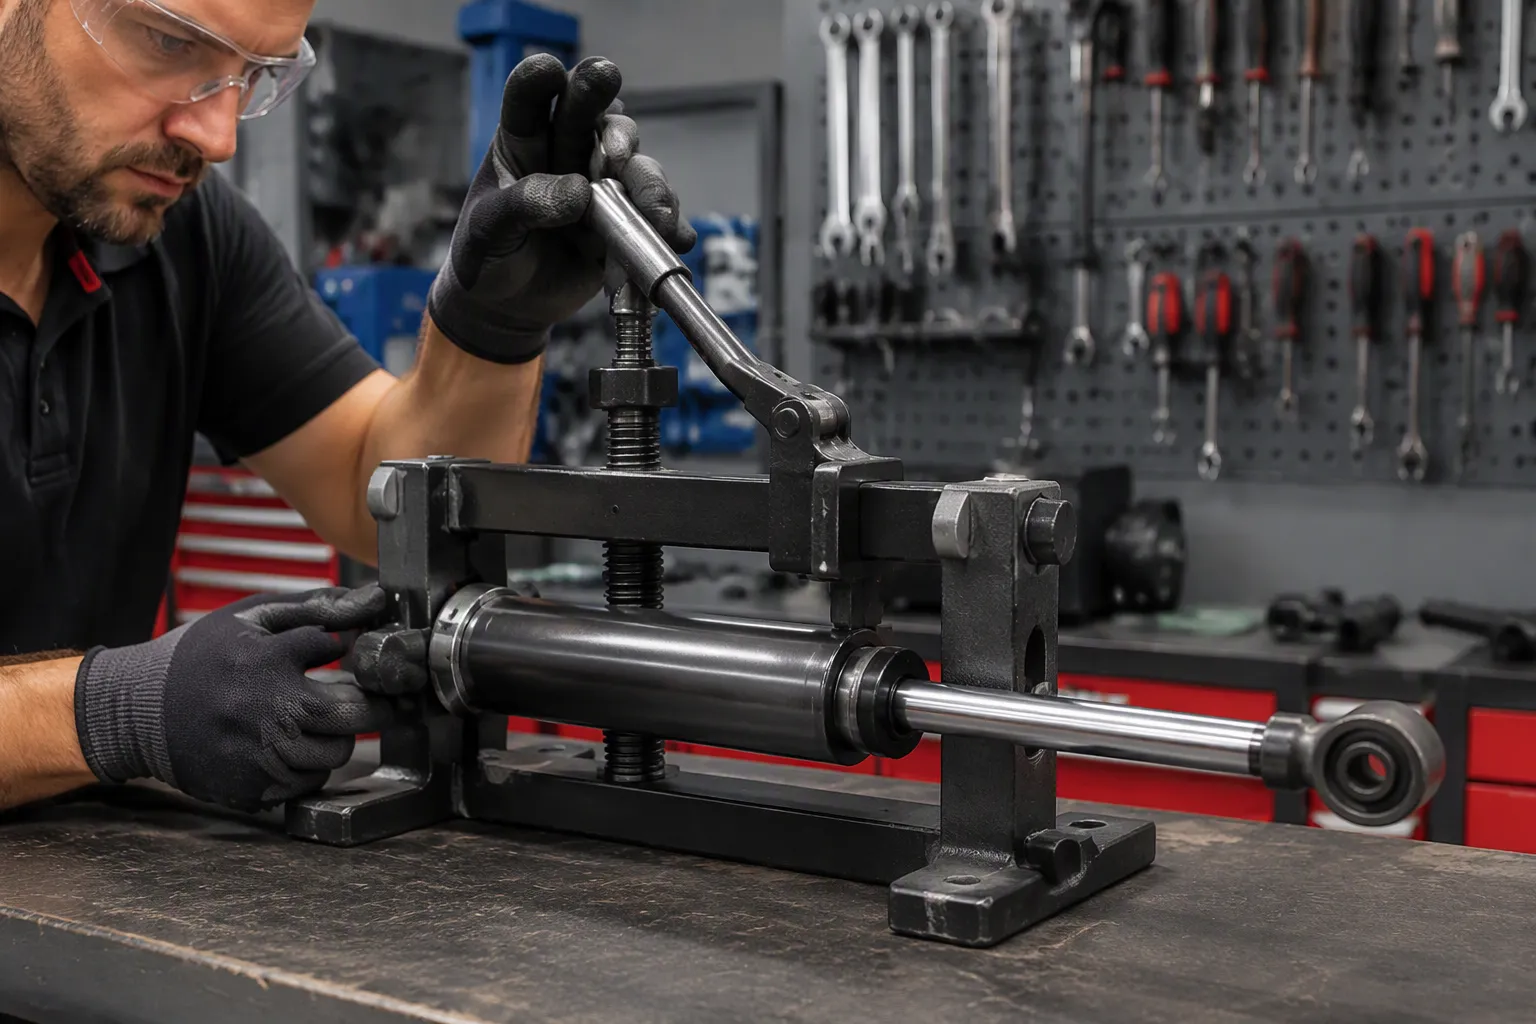
Threaded mechanisms or levers offer another safe option. These tools compress the strut gradually and hold it at the necessary installation length. You turn a handle or crank. The threads advance slowly. Each turn moves the rod deeper into the cylinder. This controlled motion prevents sudden jerks.
These tools often use a threaded mechanism or lever to compress the strut gradually and hold it at the necessary installation length.
The threaded design gives you mechanical advantage. You apply less force to compress the rod into the cylinder. The lever holds the position once you stop turning. This feature is critical for installing the compressed gas strut. You need both hands free to align the mounting points.
Properly compressing the gas strut before fitting reduces installation time. The strut stays at the right length. You can position it without fighting the internal pressure. This method also lowers the risk of damage to the rod or seal.
JUTENG lockable gas springs offer hydraulic damping for smooth movement and can be fixed in any position. These units allow fixation in any position. The locking mechanism holds the strut at your chosen length. This feature simplifies compression and installation for office chairs, medical beds, and industrial equipment. The built-in hydraulic damping ensures smooth, impact-free movement. You can compress the strut to the exact length needed. The lock then holds it there during mounting.
For heavy-duty applications, a lever-based tool provides the needed force. The mechanical advantage lets you compress gas struts rated at higher forces. Always check the tool rating before use. Match the tool capacity to the strut force. A tool rated for 1000N cannot safely compress a strut with a higher force rating. Use the right equipment for the job.
How to safely compress a gas strut depends on the tool and the strut size. A clamp works for light-duty struts. A threaded compressor handles medium forces. A lever tool manages heavy-duty units. No matter the method, apply force slowly. Watch for any binding or unusual resistance. Stop immediately if the strut does not move smoothly. Replace the strut if it cannot be compressed safely.
Safety and Troubleshooting Tips
Never Puncture or Over-Compress
Safety and handling precautions begin with one absolute rule. Never puncture, heat, or cut a gas strut cylinder. The nitrogen inside is safe and non-flammable, but it stays under intense pressure. Under compression, the internal nitrogen gas generates pressures up to 150 bar (2175 psi). A punctured cylinder can release that energy violently.
Over-compressing the spring beyond its designed stroke length can permanently deform the internal components.
Respect the stroke limit during any installation. Stop applying force the moment the rod reaches its compressed length. If you must compress a gas strut before fitting, use a tool rated for the job. A clamp or threaded compressor applies force gradually. This controlled approach protects both the strut and your hands.
Fix Stiffness or Misalignment
A stiff or binding gas strut usually points to one of two problems. The force rating may be too high for the panel weight. Check the rating against the load before assuming a defect. If the number is correct, inspect the mounting points. Misalignment creates side-load and uneven force.
Symptom | Underlying Cause from Misalignment |
|---|---|
Rough or uneven motion | Wrong mounting points create side-load and uneven force |
Lid feels crooked (even with both springs installed) | Uneven force twists the panel and loads one hinge harder |
Side-loading of the rod | Pivots not kept in the same plane of motion, bending the rod sideways through the stroke |
Difficulty opening or closing | Side-load and uneven force increase stiffness and wear |
Premature seal wear / shortened life | Side-loaded rod wears the seal |
Mounting direction also matters. Where the geometry allows it, the gas spring should be mounted with the rod pointing down in the at-rest or closed position. This helps keep oil near the seal and supports smoother damping. Both pivots should stay in the same plane of motion so the rod is not bent sideways through the stroke.
JUTENG offers a broad product range for different applications. Compressed gas springs, dampers, and traction gas springs each suit specific motion needs. Dampers decelerate speed and slow masses in doors and machinery. Traction gas springs retract by default and extend under pulling force. Matching the right product to the application prevents most stiffness problems before they start.
The Ultimate Alternative: JUTENG Traction Gas Springs
Struggling to compress a high-force gas strut? You might be using the wrong type of spring for your application. JUTENG Traction Gas Springs work in reverse: their natural state is fully retracted (short). Instead of fighting to compress them, you simply pull to extend them during installation, and they automatically retract when released. This eliminates installation struggles entirely and is ideal for medical beds, special machinery, and hidden cabinet hardware.
Prevent Installation Issues with JUTENG Design Service
For B2B buyers and manufacturers, guessing the correct Newton (N) force or stroke length leads to costly installation errors. JUTENG's Application Design Support utilizes 3D modeling (CATIA/SolidWorks) and motion simulation to calculate the exact mounting geometry and force requirements before production. This ensures your gas springs fit perfectly and compress naturally upon assembly.
Need Help Selecting the Right Gas Strut?
Don't struggle with incorrect sizing or force ratings. Let JUTENG's engineering team calculate the perfect gas spring solution for your project. Get a free quote and professional design support today.
Get a Free Quote & Design SupportManual compression of a gas strut is rarely needed during installation. Correct installation lets the lid or door compress the strut naturally. The mounting geometry does the work for you. Follow this decision path each time. Verify the size and mounting points before starting. Install the strut naturally by attaching both ends. Only use safe compression tools when the geometry forces that choice.
Safety must remain a priority. Wear goggles and gloves during any work. Never puncture or heat a gas strut. The pressure inside demands respect. Replace any strut that cannot be installed safely. Do not force the installation. These steps guarantee a secure, damage-free result. The unit will perform its job correctly when mounted properly. A well-installed unit operates smoothly and lasts longer.
FAQ
Can I compress a gas strut by hand?
Manual compression is rarely necessary. The lid or door compresses the gas strut as it closes. A 200N strut resists with about 45 pounds of force. That resistance makes hand compression risky. Use the panel's natural movement instead.
What happens if the gas strut is the wrong size?
A wrong-size strut cannot fit both open and closed positions. The compressed length may exceed the available gap. The extended length may not open the panel fully. Replace the strut with the correct size before installation.
How do I know the force rating is correct?
Match the force rating to the panel weight and mounting geometry. A 60-120 N strut suits a lightweight cabinet door, while a higher-rated strut supports a heavy machinery cover. Check the rating against the load before installing gas struts.
Can I install a gas strut without tools?
Yes. Ball stud and socket fittings allow tool-free attachment. Snap each socket onto its ball stud until it clicks. Tug gently to confirm engagement. The panel then compresses the strut naturally during installation.
What should I do if the strut binds or feels stiff?
Check the force rating first. A rating too high for the panel causes stiffness. Inspect the mounting points next. Misalignment creates side-load and uneven force. Correct the geometry or replace the strut.
Recent News
1.AIRCRAFT INTERIOR ALUMINUM LOCKING GAS SPRINGS
2020-06-232.Tension Gas Springs: A Complete Selection Guide
2026-09-073.Lockable Gas Spring Applications for Bus Seats
2026-08-294.Which Gas Spring Performs Better Stainless-steel or Regular
2026-07-285.Standard vs Adjustable Locking Gas Springs for Heavy Lids
2026-08-17